LEVERAGING WEBHOOKS IN SERVICE MANAGEMENT
In this post:
- Webhooks: what they are and why they exist.
- Worked example: How to leverage Webhooks to send SMS messages from The Vivantio Platform using Twilio (Highly technical)
In our last Customer Center post we looked at the what and why of Web Methods and how they can be used to create lightweight endpoints to receive messages from external services such as CopperEgg. In this post, we’re going to look at what you might call the opposite of Web Methods: Webhooks.
What is a Webhook?
Webhooks are nothing new in the tech sphere. Jeff Lindsay came up with the term Webhook in 2007, and if you’re interested, you can read more about the general principle here. If you’ve been following the series, you’ll know that in the last blog post we looked at using Webhooks coming from Copper Egg to send information to Vivantio. The basic goal of a Webhook is to allow one system to connect to another via a HTTP request to carry out an action of some description – telling us an alert condition was detected in the CopperEgg example. So in this post we’re going to look at how you can use Webhooks coming from Vivantio to send information to other systems.
Why use Webhooks?
If you’re looking at integrating Vivantio’s ITSM software with another business tool – CRM, Bug Tracking, Billing, etc. – there’s a good chance the system you’re integrating with is going to need to know when something has happened in Vivantio, such as a new Ticket has been logged or a Ticket has been closed. Without Webhooks, you’d probably end up with a solution that polls the Vivantio API looking for new events you’re interested in and then doing something with them. There are a few downsides to that approach:
- You’ve got a lot of code to write and maintain
- You have to find somewhere to deploy it
- Your IT solution is either a. very chatty or b. slow to respond to events (or both!)
Webhooks solve some or all of those problems:
- You don’t need to write code*
- They’re contained within the Vivantio ITSM Platform
- Event notifications are sent in near real-time
*At least not in Vivantio’s service management tool. Depending on the system you’re integrating with, you might have to write some code to handle the request coming out of Vivantio – we can’t always help you out there! But feel free to email support@vivantio.com and we might be able to give you some pointers, examples or best practices.
Worked Example – SMS via Twilio
Vivantio Webhooks allow you to easily get up and running with with SMS messaging. There are a number of SMS providers out there with HTTP APIs. Our favorite of these providers is Twilio. In this example we’re going to walk you through setting up a Webhook in Vivantio that lets you easily send an SMS message via Twilio.
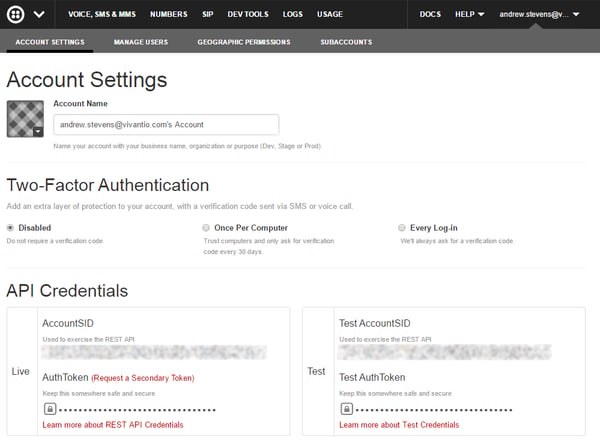
To follow this example, you’ll need to sign up for a Twilio account. Once you’ve done that, make a note of your Account SID and Auth Token from the “My Account” page:
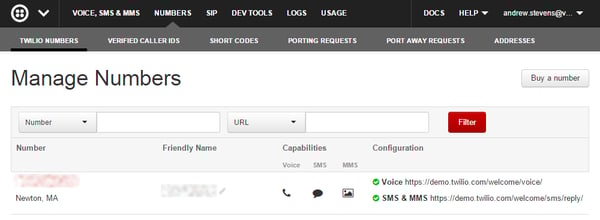
You’ll also need to set up a “From” phone number. You can do this in the “Numbers” section of your account:
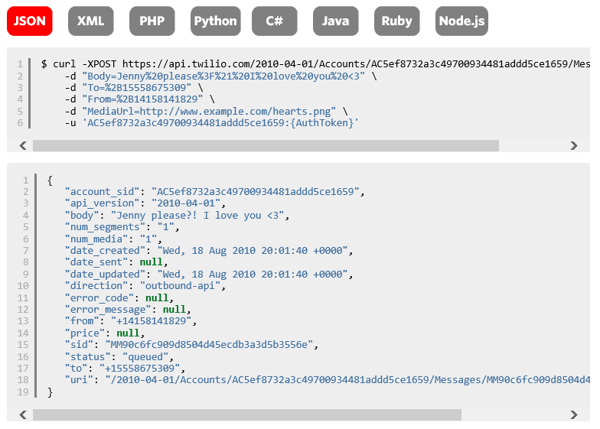
Finally, take a look at Twilio’s API documentation here. That describes the format of the HTTP request that should be sent to Twilio:
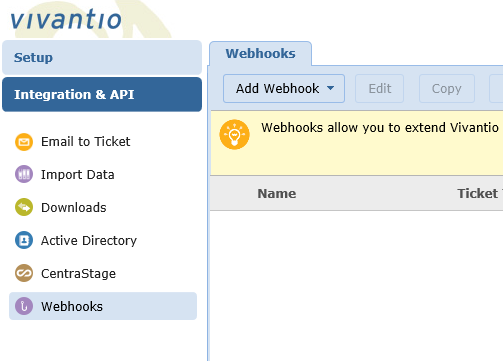
The next step is to set Vivantio up to send a message to Twilio similar to the one shown above. So log in to Vivantio and head to Admin → Integration → API → Webhooks:
If you don’t see that option there, contact us via email or our support portal and we’ll enable it for you.
Once you’re there, click “Add Webhook” and you’ll see a list of your available Ticket Types.
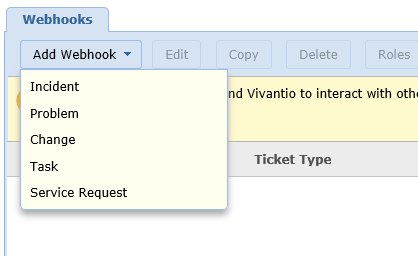
Choose one, and you’ll see the Add Webhook dialog, starting off with the Basic Details tab.
Basic Details
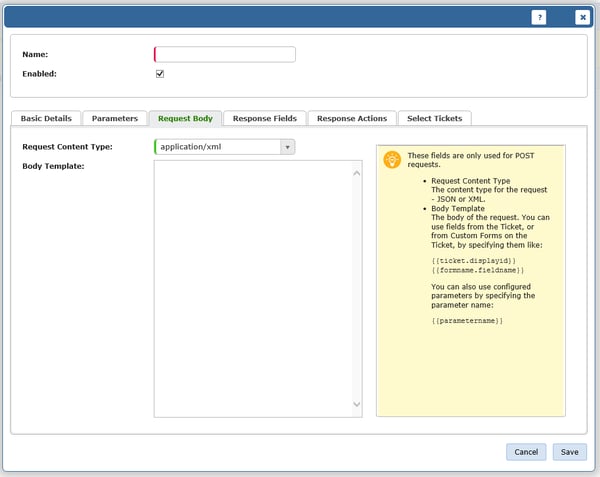
First up we’re going to give it a name – here, we’ll be using “Send SMS via Twilio.” Then you have a few other simple fields to fill out:
Request URL
This is the URL at Twilio we want to make the HTTP request to when the Webhook is run. You can get this from your Twilio account. It’ll look something like:
https://api.twilio.com/2010-04-01/Accounts/YourAccountSID/Messages.json
Add that into Vivantio:

HTTP Method
This is the method the request will use. At the moment we only support GET and POST; for Twilio, we’re going to use POST:

Username / Password
Your username is your Twilio Account SID; your password is your Auth Token. If you’re following this walk-through, you’ll have noted these down earlier:

Response Content Type
In this example, we’re not going to do anything with the response we get from the request to Twilio, so this isn’t crucial. The response will be in JSON format though, so let’s pick that:

Action Description
The final box lets you enter some text to appear in the Ticket History after the Webhook has been executed. You can enter whatever you want here:

Advanced users can use the to reference parameters so that parts of the Webhook can appear in the Ticket History. That can be left as an exercise for the reader to experiment with!
With the Basic Details complete, we move on to the next tab, Parameters.
Parameters

When the Webhook executes, Vivantio is going to send some data to another system. Sometimes, that data is going to come from within the Ticket that started off the Webhook like the Ticket ID or Description, for example. Sometimes though, you might want to allow the person running the Webhook to enter a value to use in the Webhook. In our example, we want to let the user enter a) the text to be sent in the SMS, and b) the number to send it to, so we’re going to add two parameters – Recipient and Text.
Recipient
As you might have guessed, this represents who is going to receive the SMS.
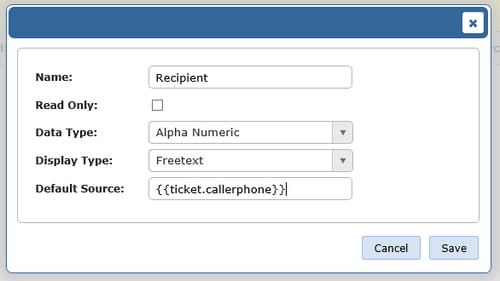
Name
The label that will appear on screen next to the input field when the user runs the Webhook – we’ve gone with “Recipient”. This is also used to reference the value within the Webhook body as we’ll see a bit later.
Read Only
Whether or not the end user can edit the field when they run the Webhook. In our example we’ll allow the user to adjust the number if needed but in the real world you might want to restrict this.
Data Type
The type of data that the field will allow. At the moment we only support alpha-numeric fields but we’ll be adding more as we continue to develop the Webhooks module. As always, if you need something that isn’t there, let us know!
Display Type
How the field will appear on screen. We only need a single line text box for the recipient phone number so we’ll choose “Freetext”.
Default Source
The “Default Source” for the parameter value, i.e. what the field will be populated with when the user runs the Webhook. You can either enter a fixed value or use the here to reference properties from the ticket. In this example we’ll use {{ticket.callerphone}} to get the phone number of the caller from the Ticket.
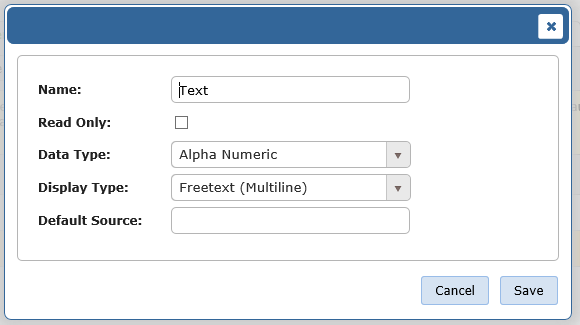
Text
For the second parameter, Text, we’ll use the values shown below. Although similar to the above, here we want a multi-line text box and we don’t need a Default Source specified.
Now that the parameters are set up we can move on to the next tab, Request Body.
Request Body

This is where we set up the actual HTTP request that will be sent to Twilio. To start, we’re going to set the Request Content Type to application/x-www-form-urlencoded – that’s the format Twilio accepts:
Next, we’re going to give it a name – here, we’ll be using “Send SMS via Twilio.” Then you have a few other simple fields to fill out:

For the Request Body, we need to go back to the Twilio API docs we saw earlier. The Twilio example given is:
Body=Jenny%20please%3F%21%20I%20love%20you%20<3&
To=%2B15558675309&
From=%2B14158141829&
MediaUrl=http://www.example.com/hearts.png
We don’t need the Media URL parameter and we’re going to take the Body and To fields from the parameters we created. Our Request Body is going to look like this:
From=YourTwilioFromNumber&To=&Body=
(Replace the italicized bit with your Twilio From Number – you did set one up earlier, right?)
That leaves us with:
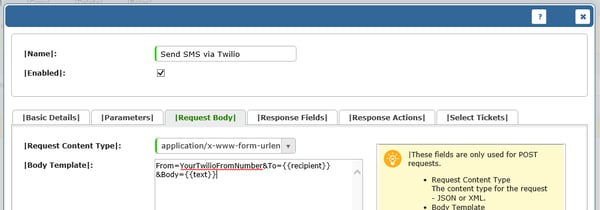
That’s all we need to send a basic SMS out. The next tabs along are “Response Fields” and “Response Actions.” We mentioned earlier that we won’t be using the response from Twilio so we’ll skip these two for now. An upcoming blog post will show you how to use Response Fields effectively. So we’ll go straight on to the final tab we’re interested in, Select Tickets.
Select Tickets
This tab lets you configure which Tickets the Webhook is available. In our example, it’s a simple restriction – where the “Caller Phone” field isn’t empty. If we haven’t got a phone number for the end user we can’t send them an SMS! Although, since we left the “Recipient” field editable by the technician, we could leave this blank so it appears for all tickets and you’d be able to enter the number when you run the Webhook.
In a more complicated scenario, you might want to restrict it so that SMS messages are only available on tickets logged by end users who have signed up to receive SMS updates. Or any of a variety of other scenarios.
Once you’ve done that, hit “Save” and you’ll see the Webhook in the list. We’re almost ready to use it:

There’s one more step in the admin area: configuring Roles. You can restrict which Roles can execute each Webhook. By default no permissions are granted, so you’ll want to select the Webhook, hit “Roles” and drag over one of the roles you’re a member of:
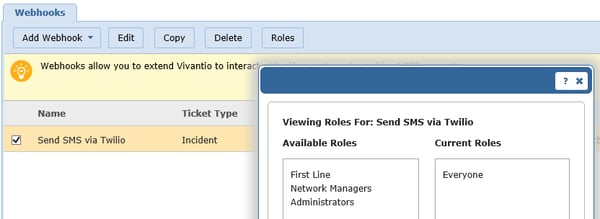
All the configuration is done! Now, when you view a Ticket that meets the conditions set in the “Select Tickets” tab, you’ll see the Webhook appear in the “More” menu on the Ticket Details page:
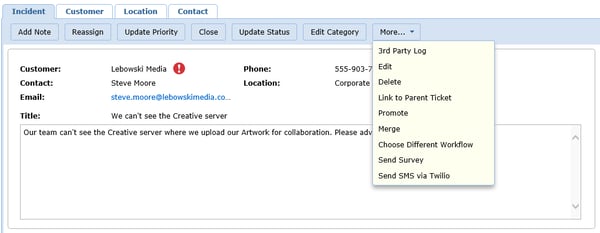
Clicking that option will bring up a dialog prompting you for any parameters (with defaults set, if configured):
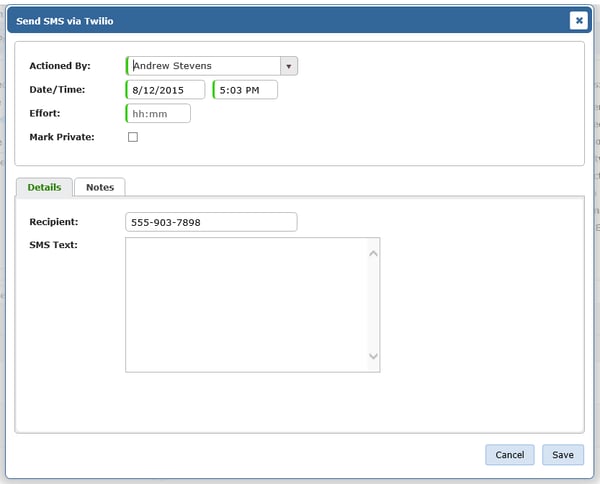
Shortly after hitting “Save” your SMS will be sent.
Job done! Vivantio’s service management platform can now send SMS messages via Twilio without writing a single line of code (well…sort of…you had to write the body of a HTTP post, which is almost code – although our development team might take offense if we start calling that coding).
That wraps up this brief introduction to Webhooks. In our next blog post, we’ll be looking at using Business Rules to tie Web Methods and Webhooks together, to give you a more complete end-to-end view of the power of Web Method and Webhooks. You can get started with Webhooks now though – and if you find an interesting use case for them, let us know. We can help you set them up if required, and if what you’re doing is really cool, you might find yourself the subject of an upcoming post!

