INTRODUCTION
In every company, it is crucial to have effective, efficient communication, such as the ability to alert your team about new urgent issues, or let a customer know you’ve responded. Thanks to API integration and webhooks, Vivantio makes sending messages to applications such as Microsoft Teams from your department easy. If your organisation uses Slack instead, you can find a tutorial on sending out communication from Slack here.
This tutorial will show you how to configure this in Microsoft Teams and provides two examples of using notifications in the Vivantio platform. Please note that Microsoft Teams transitioned to a new webhook URL format to enhance security on January 11, 2021. If you've configured this integration prior to that date, there are new set-up instructions included at the end of this blog for Step 7.
To connect Vivantio to Microsoft Teams, you’ll need:
- Vivantio ITSM
- Admin access to your Vivantio Instance
- Permissions in MS Teams to create, update and remove connectors for the Team you wish to post to
CONFIGURATION IN MS TEAMS
Step 1:
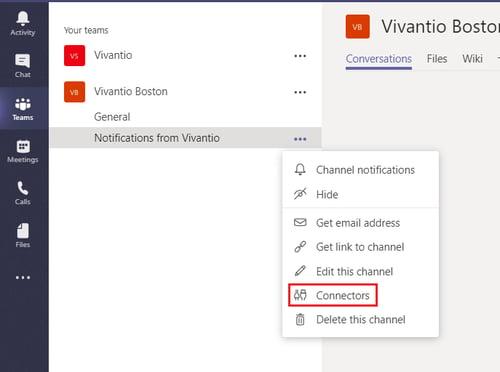
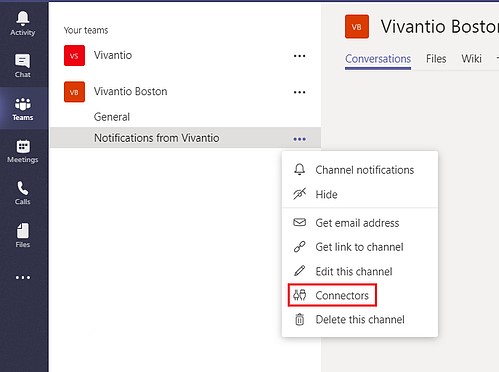
Begin by logging into Microsoft Teams (MS Teams). You will then go to:
Your teams » Click on the channel within MS Teams you want to send notifications to » More options » Connectors
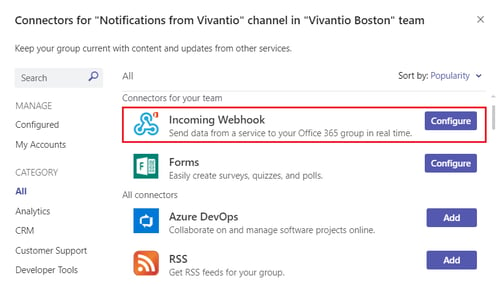
Step 2:
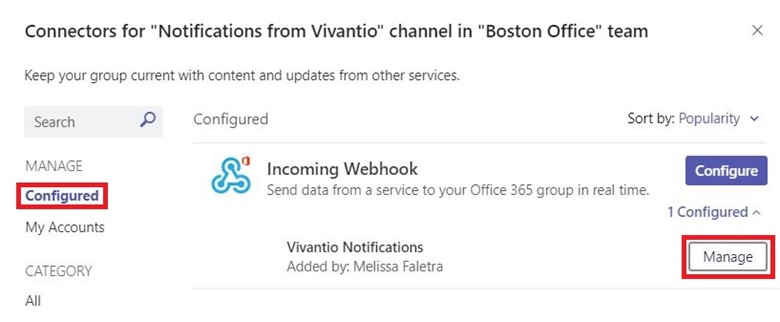
If it’s not already installed for the selected MS Teams group, add and install Incoming Webhook. Otherwise, configure Incoming Webhook.
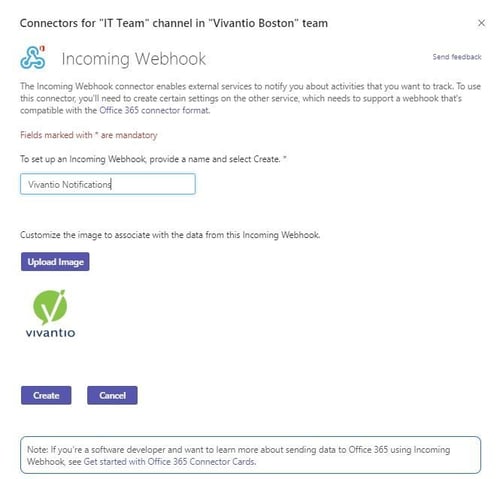
Step 3:
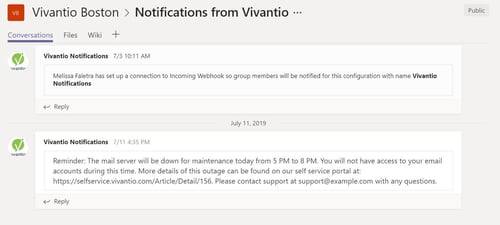
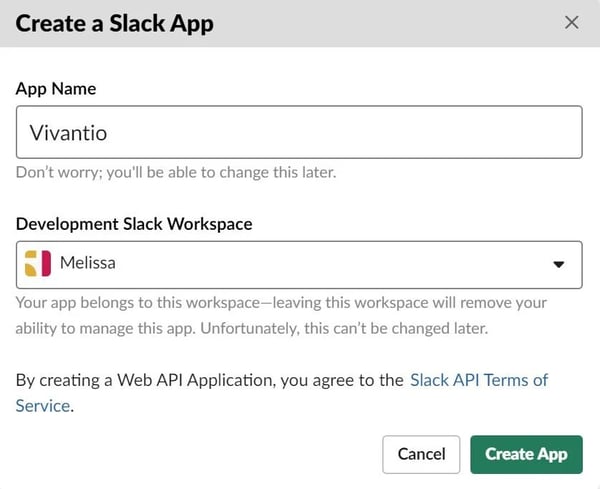
Enter a name for your webhook (this will be the username associated with messages sent into MS Teams), upload a custom image if desired, and select Create.
Step 4:
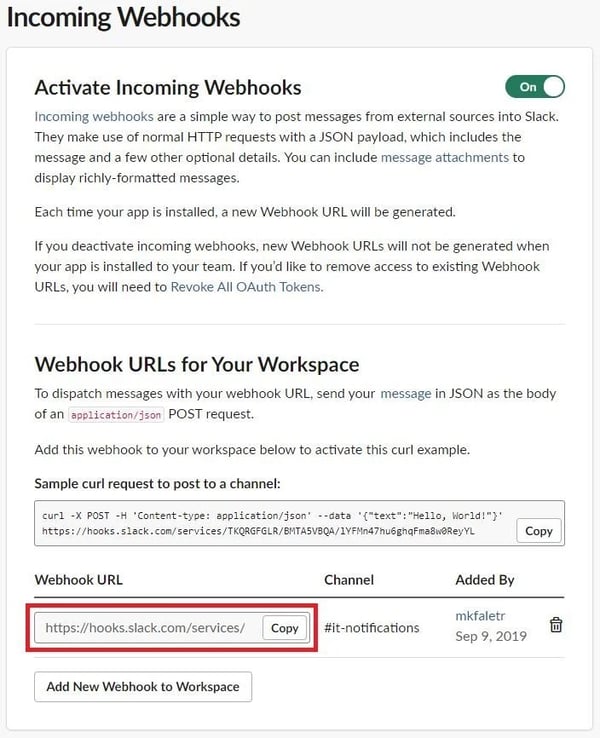
Next, copy the URL that is created, circled in red below. This will later be used to set up the webhook in Vivantio.

CONFIGURATION IN VIVANTIO
Step 5:
Log into Vivantio, open the Admin Area. Navigate to:
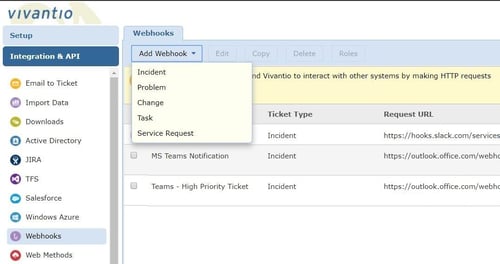
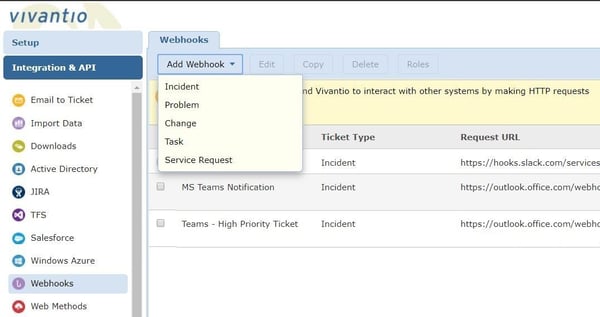
Integration & API » Webhooks » Add Webhooks
Then select the ticket type you want the webhook to be available for.
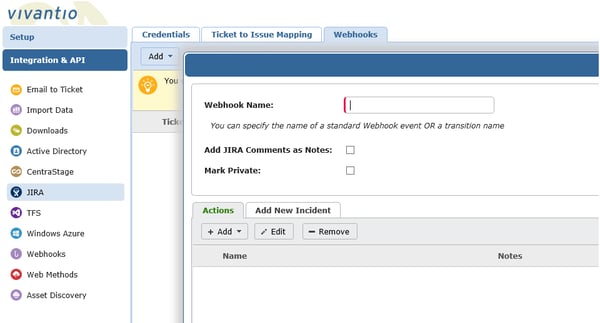
Step 6:
Enter a name for your webhook.
Step 7:
Next, navigate to the Basic Details tab and enter the following information (please refer to the Update at the end of this blog if you configured this integration prior to January 11, 2021):
- Request URL: Paste here the URL produced when you configured the incoming webhook in MS Teams.
- HTTP Method: POST
- Response Content Type: text/html
Step 8:
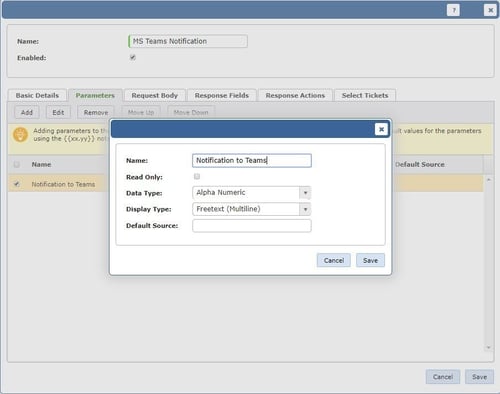
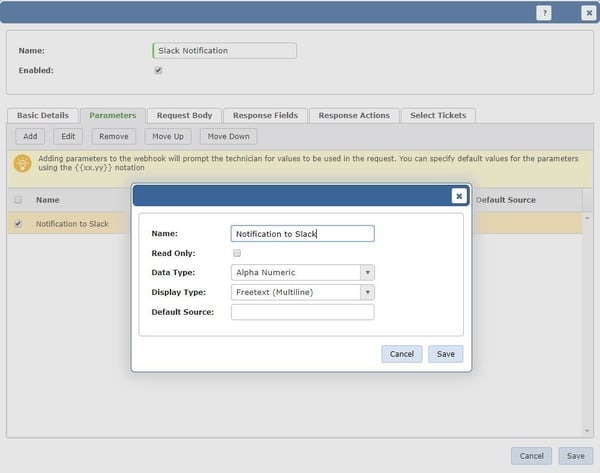
This next step, filling out the parameters tab, is optional. Set up parameters for the webhook by selecting Add. These are either values the technician will be prompted to complete, or populated automatically from the ticket. In this example, we have created a multi-line text field for a technician to enter the message that they wish to send into MS Teams.
Step 9:
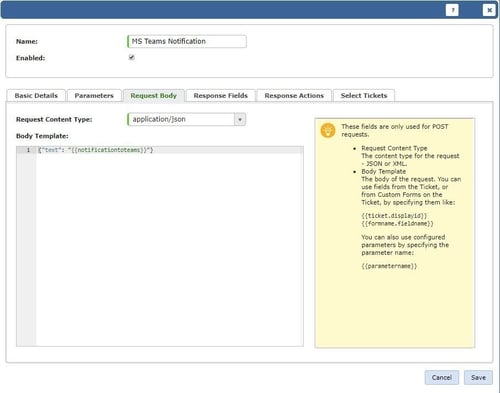
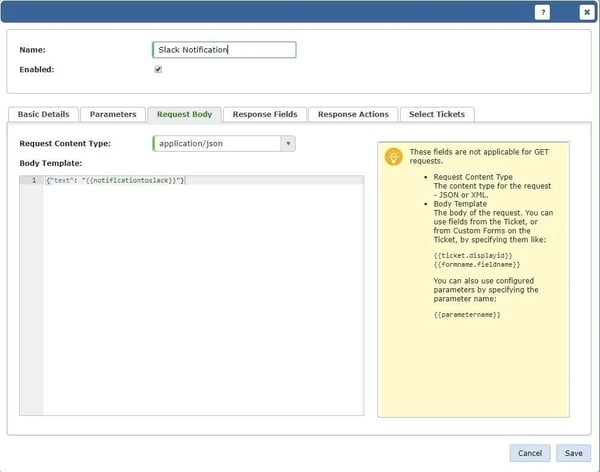
Now, fill out the Request Body tab.
For the Request Content Type field, select application/json. The Body Template will contain the information you wish to send in MS Teams notification, such as specific text, details from the ticket or a webhook parameter. Screenshots from the Request Body of two example webhooks are given below.
Example 1:
A notification message sent into Teams that utilizes the webhook Parameter we created in the previous step.
{"text": ""}
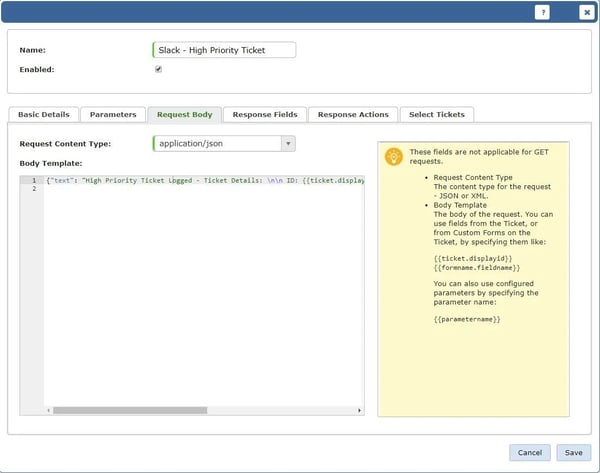
Example 2:
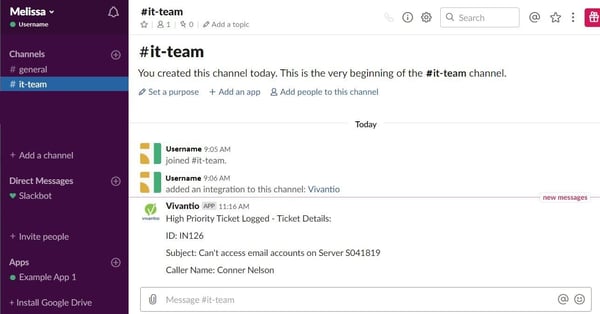
A notification sent into Teams that includes details from the ticket. In this case, we use fields from the ticket. The “\n\n” signifies a line break. Note that Steps 1 through 8 were followed to create another webhook “Teams – High Priority Ticket.” Once the Request Body is filled in, click save.
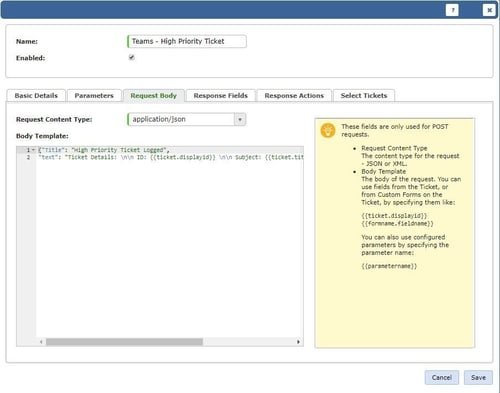
{"Title": "High Priority Ticket Logged",
"text": "Ticket Details: \n\n ID: {{ticket.displayid}} \n\n Subject: {{ticket.title}}
\n\n Caller Name: {{ticket.callername}}"}
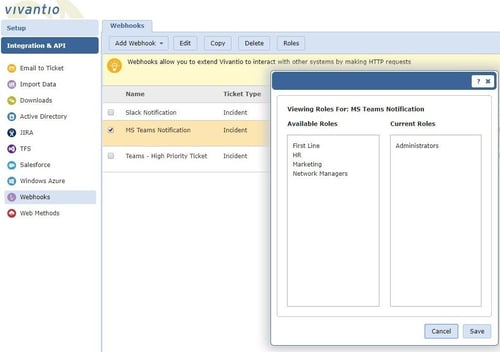
Step 10:
The last step before we can use our new webhook is to configure its roles. By default, there will be no roles assigned to the webhook. To update the roles, select the webhook and click Roles. Drag the roles you want the webhook available for into Current Roles.
Now let’s put the webhooks we set up into action!
You can use your webhook to send ad hoc notifications into MS Teams directly from a ticket window or you can execute your webhook through Trigger Rules. Two examples are given below:
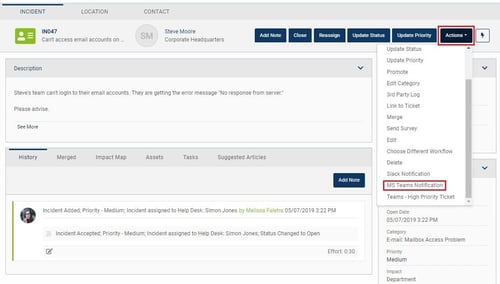
Example 3:
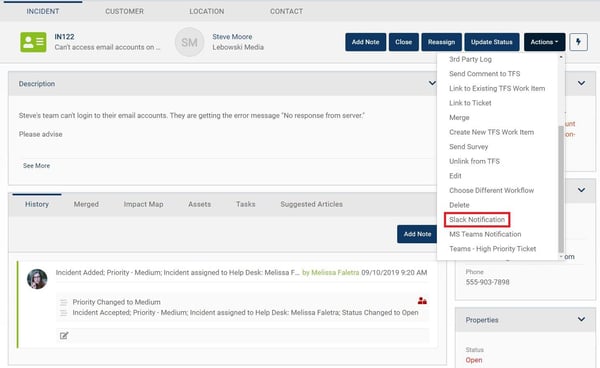
An ad hoc message sent into MS Teams from a Vivantio ticket window
Actions » MS Teams Notification
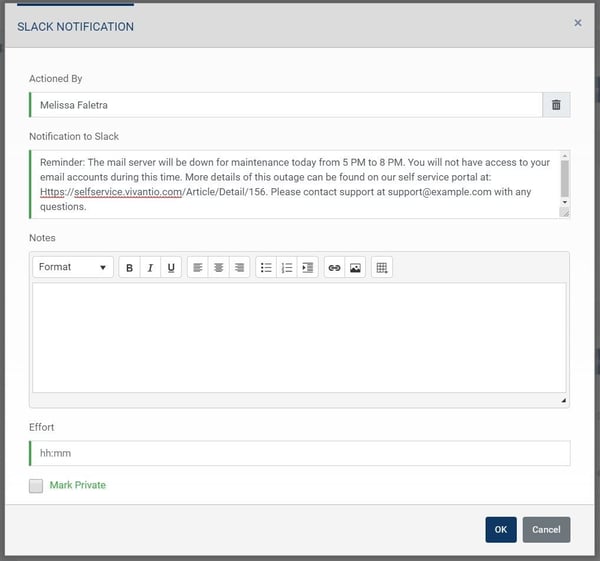
The technician is prompted to fill in the “Notification to Teams” parameter we set up in the webhook. Recall that this webhook was configured so that the text entered here will be sent into MS Teams.
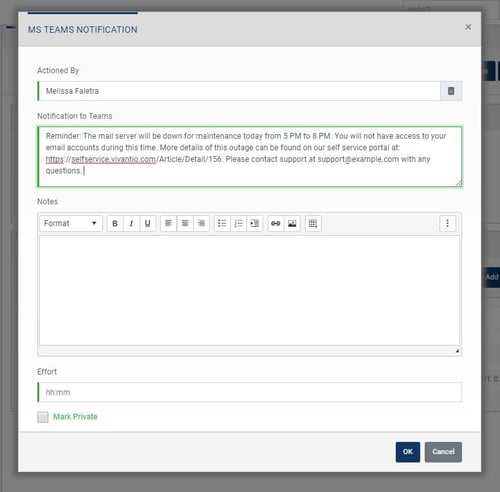
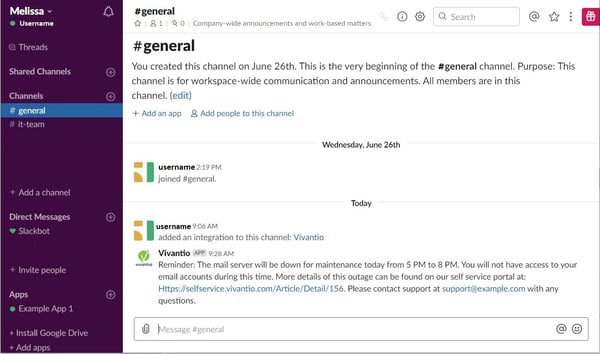
Press OK and voila! This message is sent into MS Teams.
Example 4:
Sending a notification to an IT team’s channel in MS Teams any time a high priority ticket is logged.
In this case, you can set up a trigger rule to automatically execute the webhook when a high priority ticket is logged. Go to:
Admin area » System Areas » Select the ticket type you created the Webhook for
» Business Rules » Trigger Rules
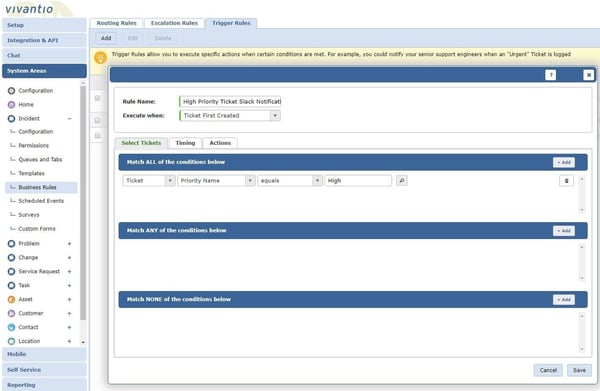
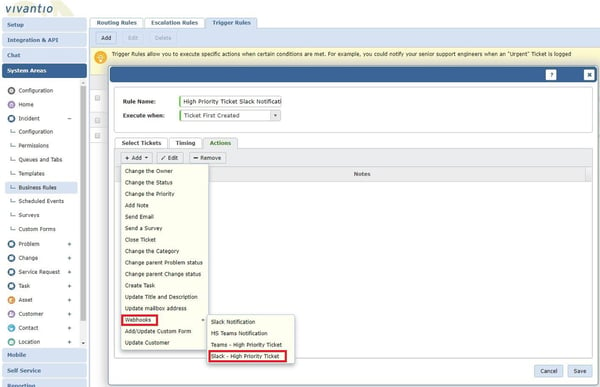
To add a trigger rule, click Add, then:
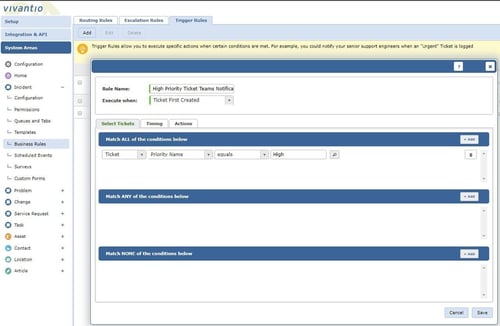
• Enter a Rule Name and select when the condition is to be executed, either when the ticket first meets the condition (for example, if you just want people to know the ticket was created) or when the matching ticket is updated (if you want everyone to see all updates to the ticket).
• Enter the condition(s) for the trigger. In this example, the trigger rule condition is for tickets with the priority name equal to “high.”
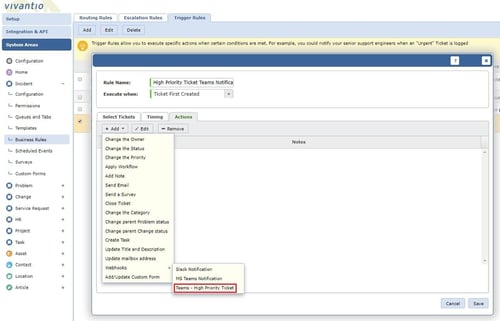
For the trigger rule “Actions” select
Webhooks » Webhook you want to fire; in this case, we chose
Teams – High Priority Ticket » Save
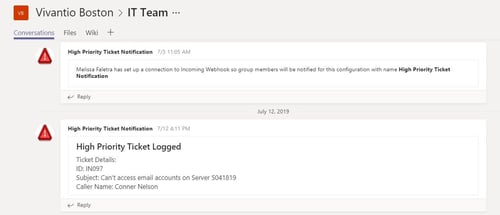
Once the trigger rule is set up, the “Teams – High Priority Ticket Webhook” will automatically send a notification with ticket details into MS Teams any time a “High Priority” ticket is logged.
CONCLUSION
There you have it! Now you can easily communicate to any team in MS Teams directly from Vivantio.
Update (as of January 11, 2021):
This step is for anyone who configured this integration prior to January 11, 2021. On this date, Microsoft Teams transitioned to a new webhook URL format to enhance security. You will need to update your webhook URL from within Microsoft Teams and copy the new URL into the webhook within Vivantio (Step 7).
To update your webhook URL within Teams, navigate to your webhook:
Your Teams >> Click on the channel your webhook is configured on >> More options >> Connectors
Select Configured. Find your webhook and select Manage.
If your webhook URL needs to be updated, an "Update URL" button will appear to the right of the URL. Select Update URL.
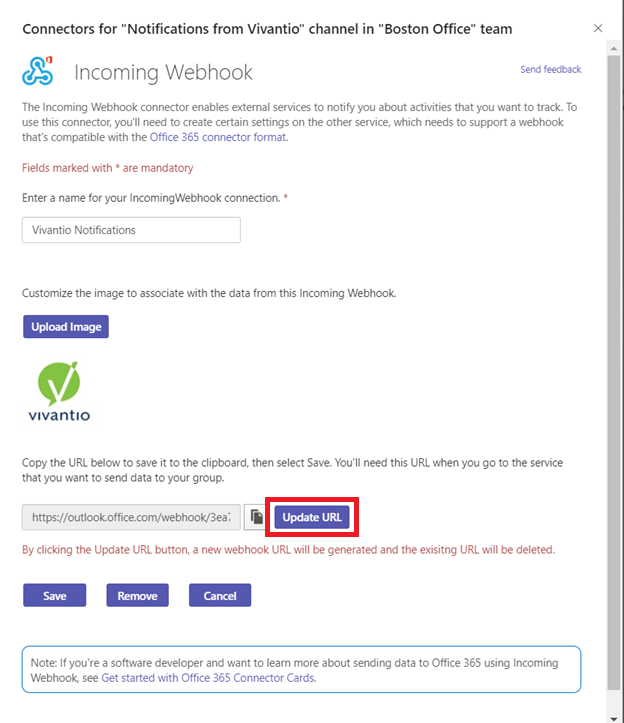
Once your URL is updated, it will say "URL is up-to-date" below the URL. Copy the new URL into your webhook within Vivantio (Step 7).
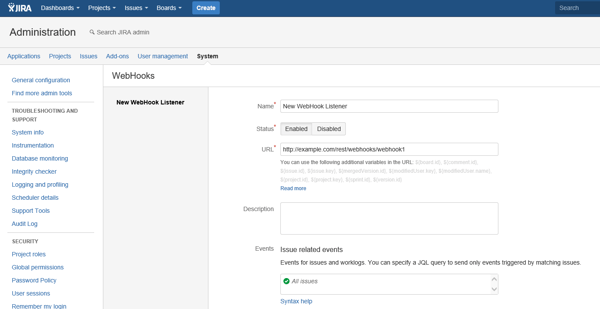
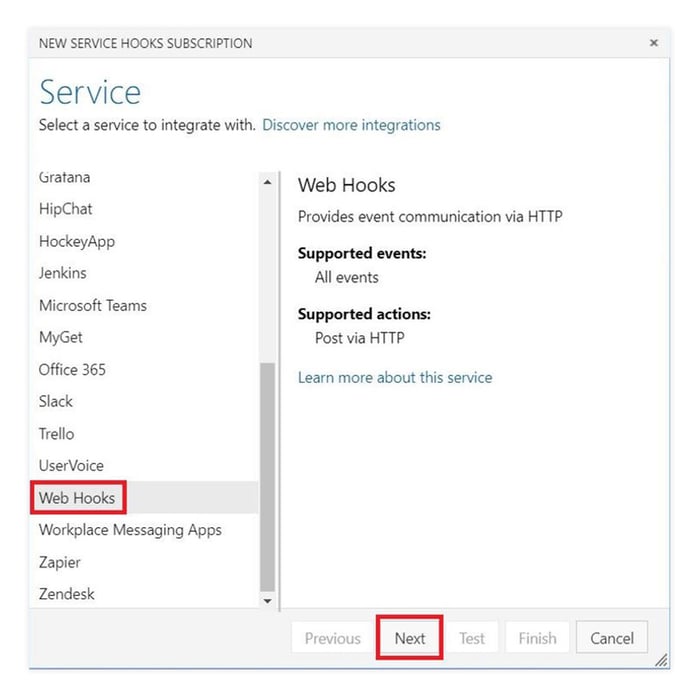
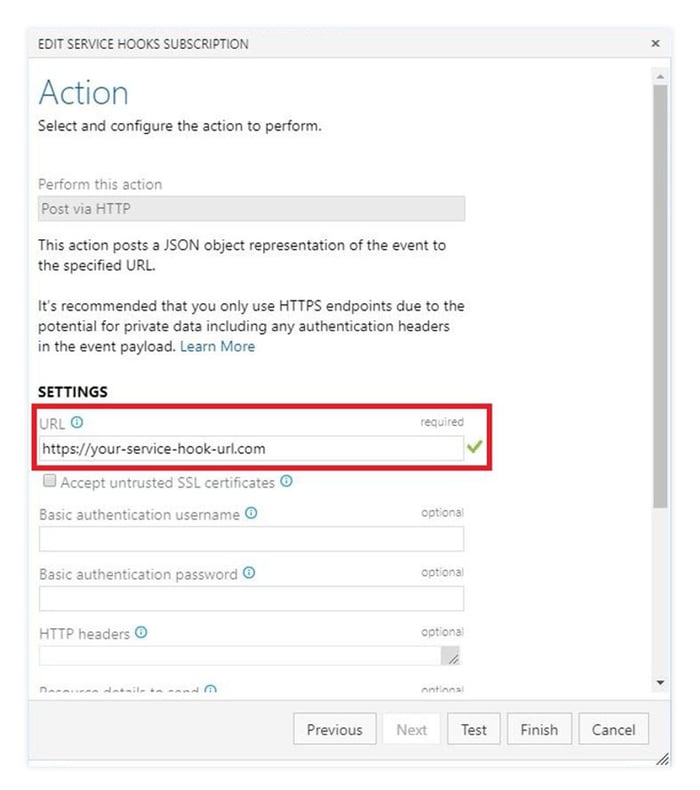
 The bottom of the screen will update to show a couple of different URLs: the Work Item Alert URL and the Service Hook URL. You will use the Service Hook URL to set up Azure DevOps to send information back into Vivantio.
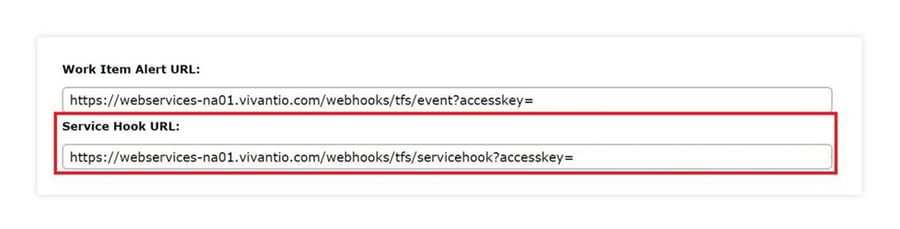
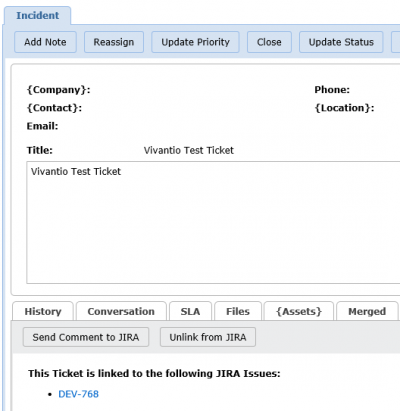
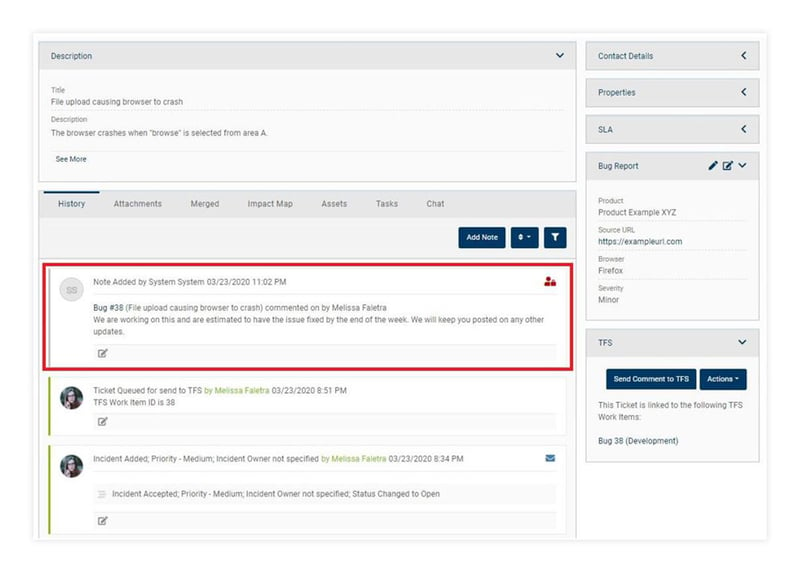
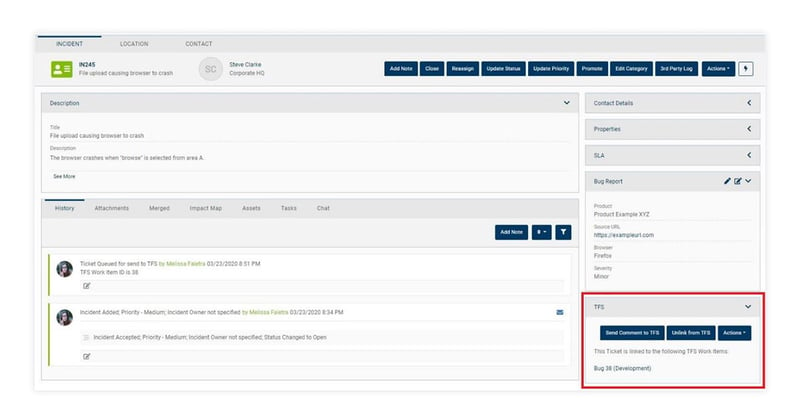 The TFS form provides a direct link to the Work Item in Azure DevOps and provides the technician with the options to unlink the Vivantio ticket from the DevOps Work Item and to send ad-hoc comments and attachments to DevOps, which can be useful if you didn’t choose to automatically sync actions.
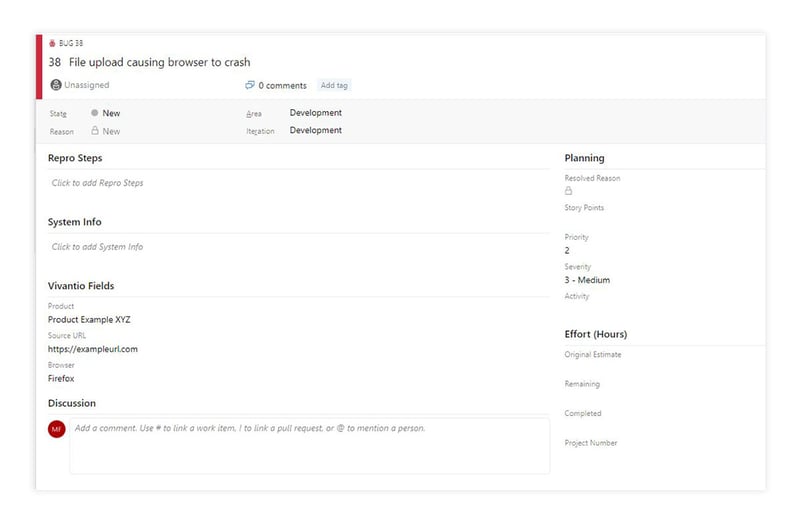

 Now when we comment on Work Items in Azure DevOps...
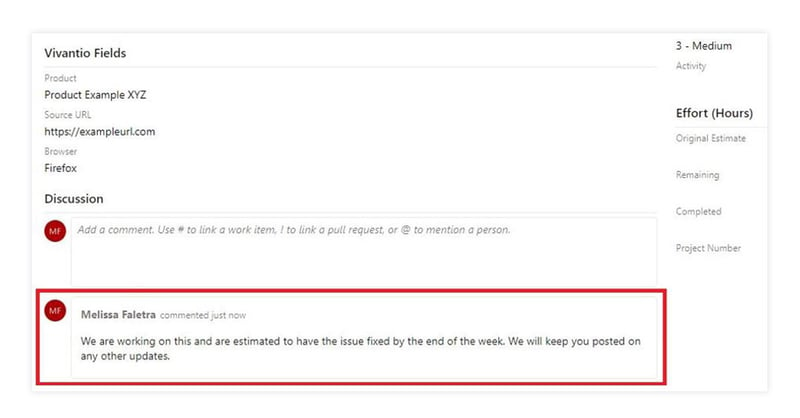
 Additional configurations can be made in Azure DevOps using Webhooks to automatically update fields in Vivantio based on updates in Azure DevOps.
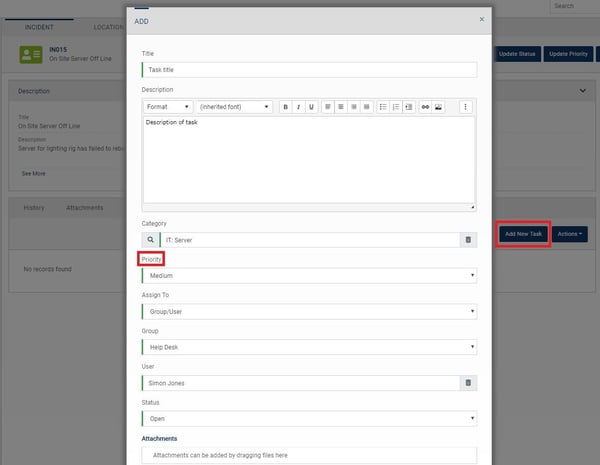


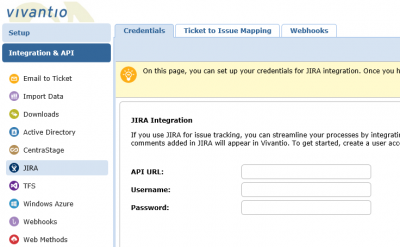
%20with%20Vivantio/Tfs-Credentials-Empty.png?width=600&name=Tfs-Credentials-Empty.png)
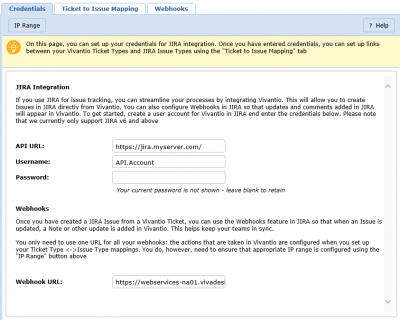
%20with%20Vivantio/Tfs-Credentials-Populated-1.png?width=600&name=Tfs-Credentials-Populated-1.png)
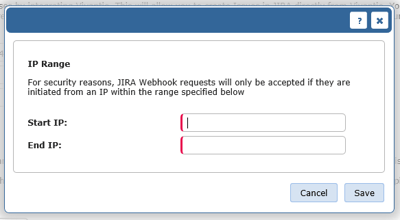
%20with%20Vivantio/Jira-IP-Range-Button.png?width=184&name=Jira-IP-Range-Button.png)
%20with%20Vivantio/Jira-IP-Range-Dialog.png?width=400&name=Jira-IP-Range-Dialog.png)
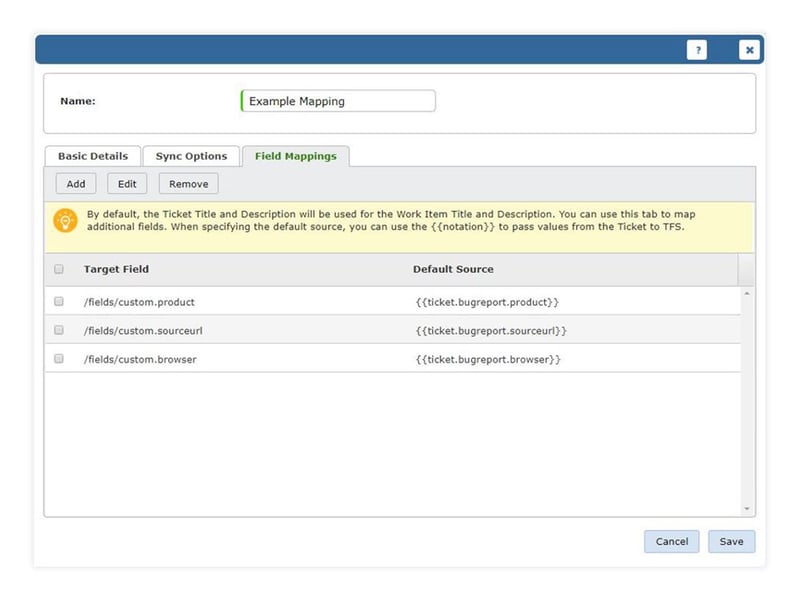
%20with%20Vivantio/TFs-Ticket-To-Work-Item-Mapping-Empty.png?width=600&name=TFs-Ticket-To-Work-Item-Mapping-Empty.png)
%20with%20Vivantio/TFs-Ticket-To-Work-Item-Mapping-Empty-Sync-Options.png?width=600&name=TFs-Ticket-To-Work-Item-Mapping-Empty-Sync-Options.png)
%20with%20Vivantio/TFs-Ticket-To-Work-Item-Mapping-Empty-Field-Mappings.png?width=600&name=TFs-Ticket-To-Work-Item-Mapping-Empty-Field-Mappings.png)
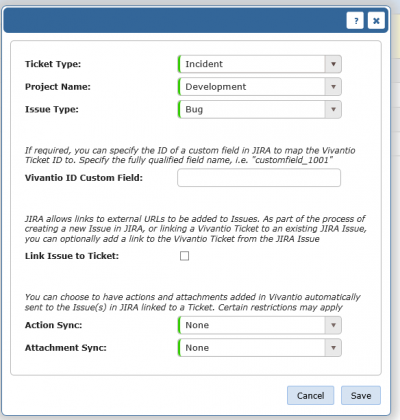
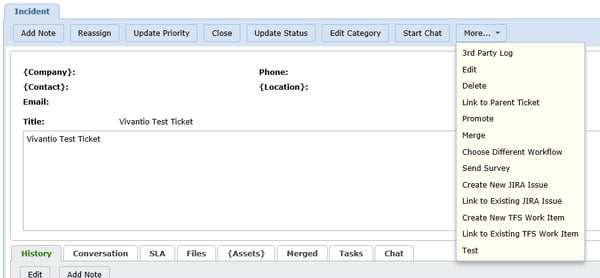
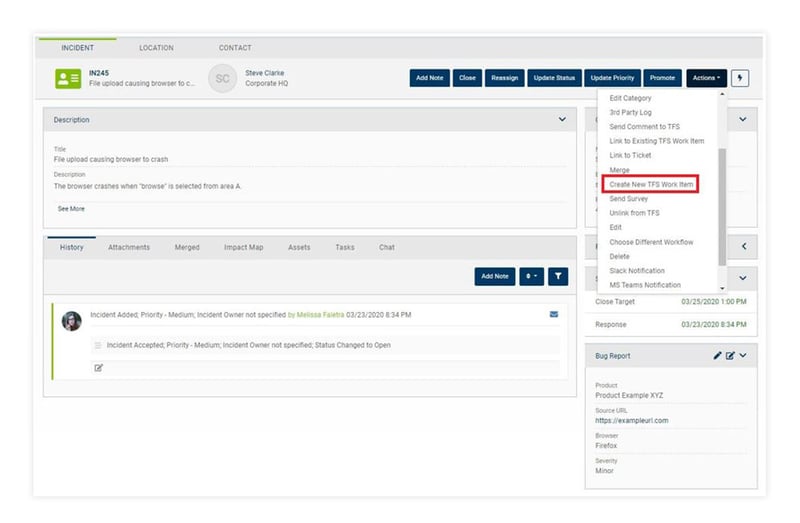
%20with%20Vivantio/Jira-Create-New-Jira-Issue-Menu-Item-1.png?width=600&name=Jira-Create-New-Jira-Issue-Menu-Item-1.png)
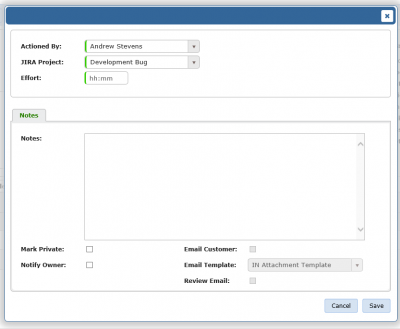
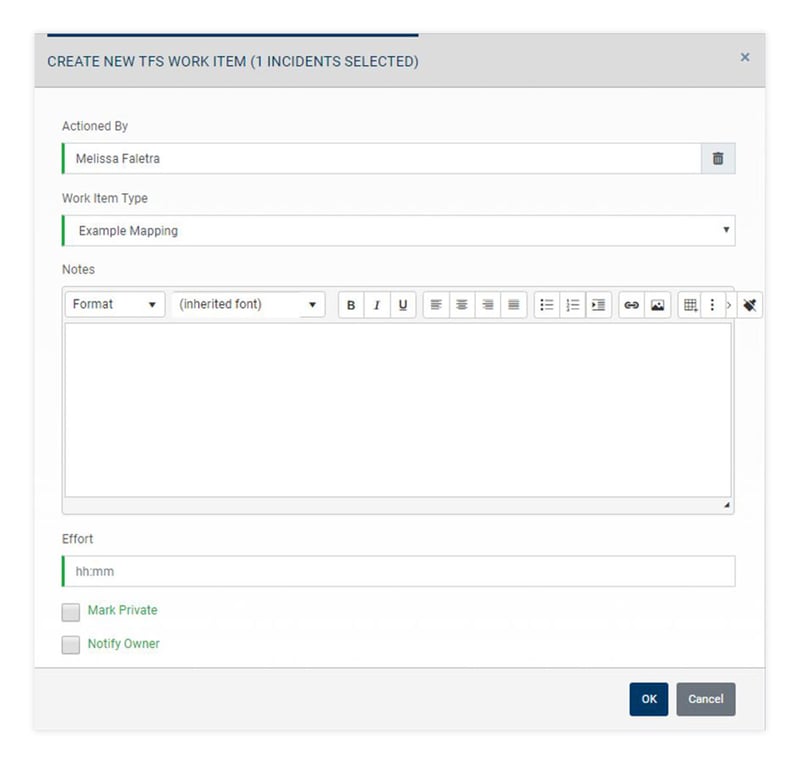
%20with%20Vivantio/Tfs-Create-New-Work-Item-Dialog-Empty.png?width=600&name=Tfs-Create-New-Work-Item-Dialog-Empty.png)
%20with%20Vivantio/Tfs-Ticket-Details-Tfs-Sub-Tab.png?width=600&name=Tfs-Ticket-Details-Tfs-Sub-Tab.png)
%20with%20Vivantio/Tfs-Tfs-Create-Work-Item-Alert.png?width=600&name=Tfs-Tfs-Create-Work-Item-Alert.png)
%20with%20Vivantio/Tfs-New-Service-Hook-Step-1.png?width=600&name=Tfs-New-Service-Hook-Step-1.png)
%20with%20Vivantio/Tfs-New-Service-Hook-Step-2.png?width=600&name=Tfs-New-Service-Hook-Step-2.png)
%20with%20Vivantio/Tfs-New-Service-Hook-Step-3.png?width=600&name=Tfs-New-Service-Hook-Step-3.png)