Azure DevOps–formerly named Visual Studio Team Foundation Server (TFS)–is a Microsoft product that allows developers to plan work, collaborate on code development and build and deploy applications. If your development teams are using Azure DevOps, integrating it with your service desk software can provide the following benefits:
- Create bugs directly from Incidents or Tickets
- Create Product Backlog Items from Service Requests or Change Requests
Vivantio includes an out-of-the-box, two-way integration with Azure DevOps, making it simple to have open communication and visibility between your support and development teams.
Our Azure DevOps integration helps you streamline your processes and keep everyone informed of what is going on, regardless of which tool they work in day-to-day, so there's no need for your developers to log into Vivantio, and no more phone calls to the development team to check on the status of bugs!
This tutorial will show you how to configure the integration and provides an example of creating a Work Item in Azure DevOps directly from Vivantio.
To connect Vivantio to Azure DevOps, you’ll need:
- Vivantio ITSM
- Admin access to your Vivantio Instance
- Credentials to a user account for Vivantio in Azure DevOps
CONFIGURATION IN VIVANTIO
Step 1:
Log into Vivantio, open the Admin Area. Navigate to:
Integration & API >> TFS
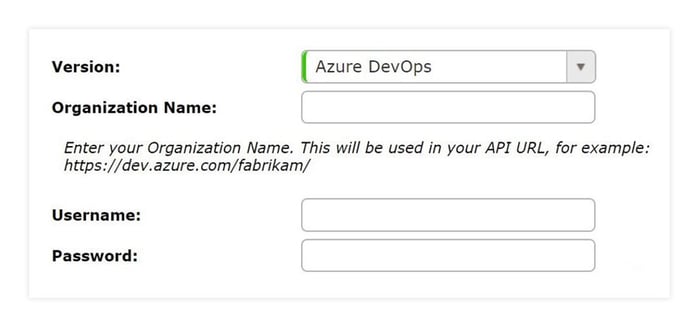
Fill in your Azure DevOps login credentials:
- Version: Azure DevOps
- Organization Name: Enter your organization name. This will be used in your API URL, for example: https://dev.azure.com/OrganizationName/
- Username: The username for the Vivantio user account in Azure DevOps
- Password: The Personal Access Token for the Vivantio user account in Azure DevOps. For details on creating a Personal Access Token, see the Microsoft Documentation here.
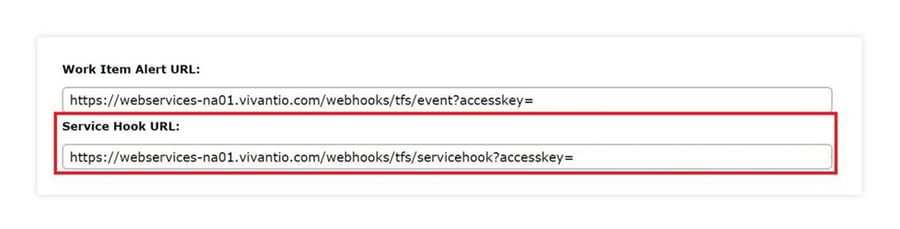
 The bottom of the screen will update to show a couple of different URLs: the Work Item Alert URL and the Service Hook URL. You will use the Service Hook URL to set up Azure DevOps to send information back into Vivantio.
Step 2:
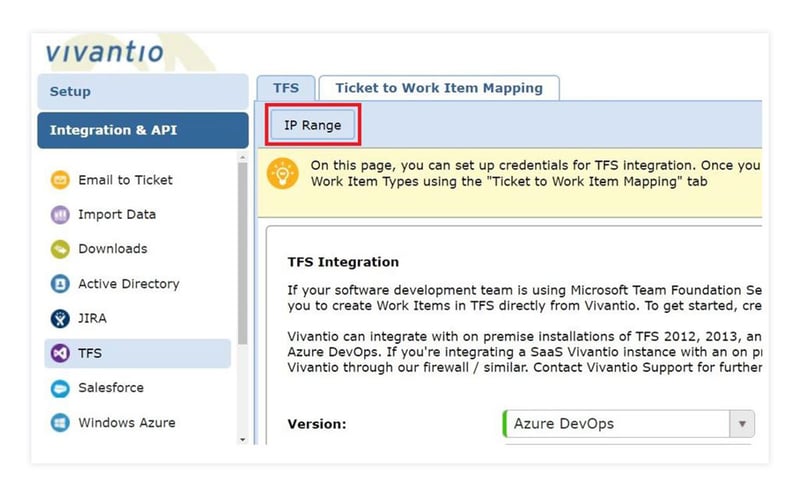
Select IP Range in the top left corner of the screen and configure the IP Range for Vivantio to accept requests from.
Step 3:
Configure your ticket to Work Item Mapping settings. This allows you to control which types of Vivantio Tickets can be mapped to which types of Azure DevOps Work Items so that the correct type of information can be transferred to the correct type of records. Any number of necessary ticket-to-work item mappings can be configured.
Navigate to the Ticket to Work Item Mapping tab and select Add.
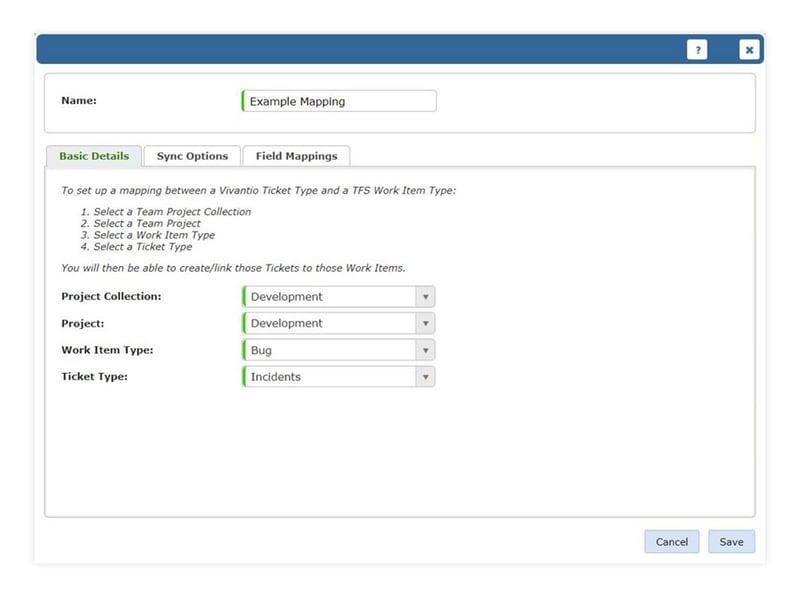
On the Basic Details tab, give the mapping a name and fill in the following information:
- Project Collection: The Project in Azure DevOps (If you’re using the hosted version of Azure DevOps, there will normally only be one option available here)
- Project: The Project in Azure DevOps
- Work Item Type: The Work Item Type in Azure DevOps
- Ticket Type: The type of ticket within Vivantio that you want to create the Work Item from
Step 4:
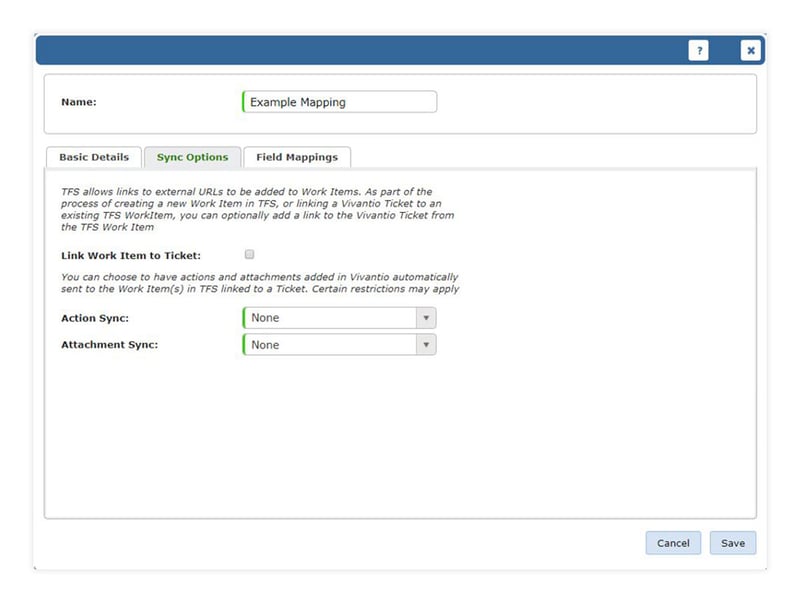
Navigate to the Sync Options tab. Here you can configure the settings relating to the sync of data from Vivantio to Azure DevOps. (Note that this option does not force Azure DevOps to update Vivantio–that is configured within Azure DevOps itself). You have the option to fill in the following fields:
- Link Work Item to Ticket: Checking this box will create a link to the Vivantio ticket from within the Azure DevOps ticket
- Action Sync: Selecting “All” or “Non Private” will automatically sync all (or only non-private) actions made in Vivantio to the “Discussion” section within the Work Item in Azure DevOps
- Attachment Sync: Selecting “All” or “Non Private” will automatically sync all (or only non-private) attachments added in the Vivantio ticket to the “Attachments” section within the Work Item in Azure DevOps
Step 5:
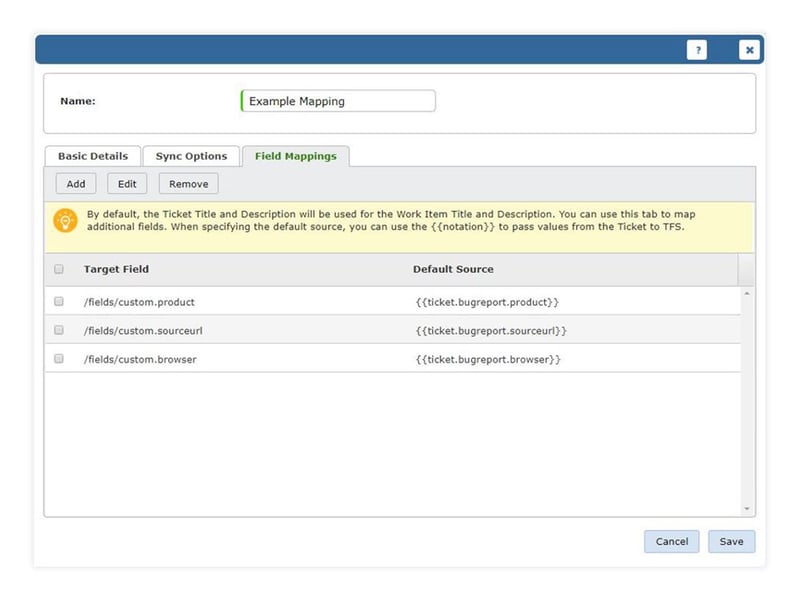
Select the Field Mappings tab and configure any additional field mappings. As standard, Vivantio will populate the Work Item Title and Description. If you want to add additional mappings, e.g., for custom fields, you can do so here. You can also choose to override the default mappings for Title and Description.
In the example below, we chose to map several custom fields from Vivantio to Azure DevOps.
After choosing the appropriate options, hit Save, and you’re ready to start creating Azure DevOps Work Items directly from Vivantio.
CREATING A NEW WORK ITEM FROM VIVANTIO
When viewing a Ticket in Vivantio, under the Actions menu item, you’ll see the option to “Create New TSF Work Item.”
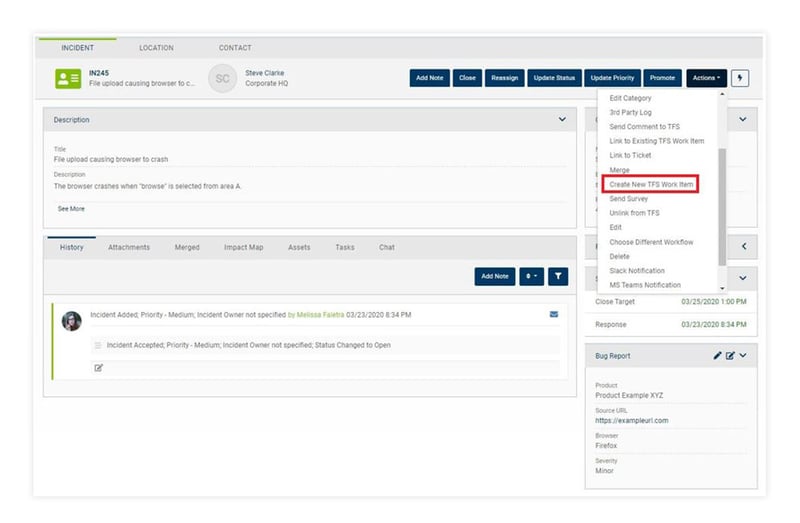
Selecting Create New TFS Work Item will open a pop-up window where you can select the Work Item Type. Any mappings created for the ticket type, using steps 3 through 5, will appear as options.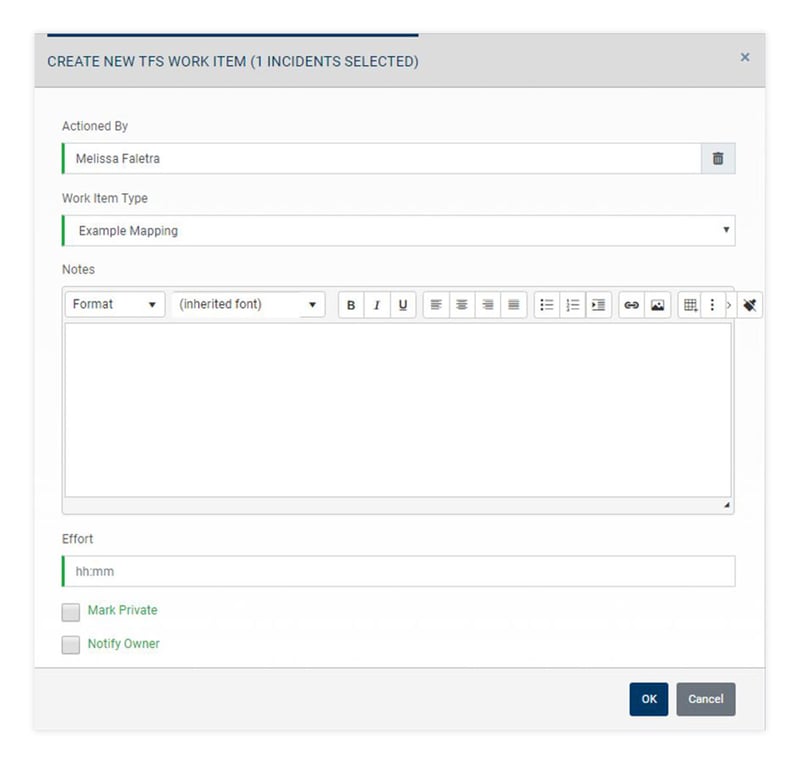 Selecting OK will cause a “TFS” Form to appear in the Vivantio Ticket Window and a Work Item to be created in Azure DevOps.
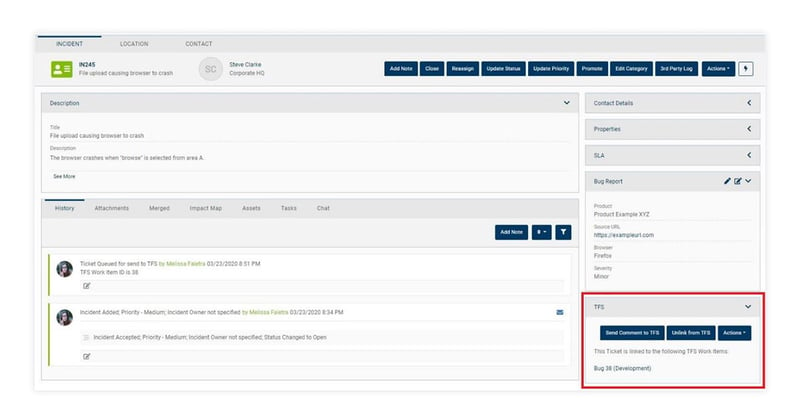 The TFS form provides a direct link to the Work Item in Azure DevOps and provides the technician with the options to unlink the Vivantio ticket from the DevOps Work Item and to send ad-hoc comments and attachments to DevOps, which can be useful if you didn’t choose to automatically sync actions.
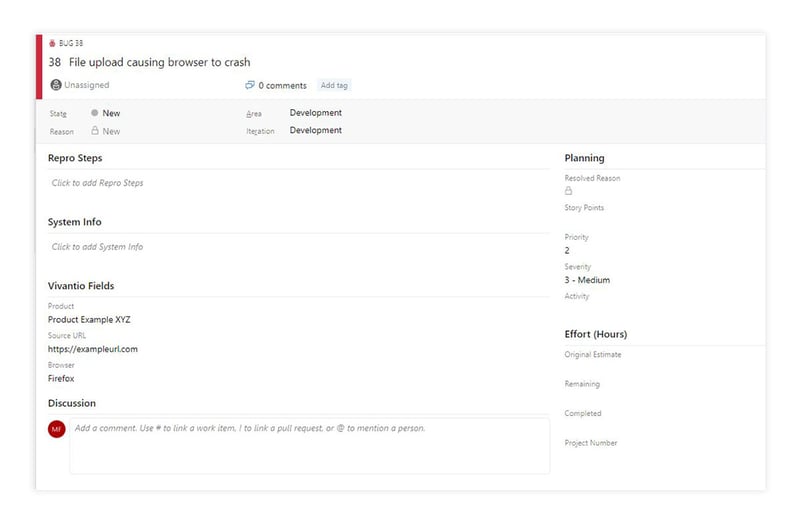
Clicking on the link to the Work Item in DevOps, we can see that the Work Item was created and the mapped fields were passed from the Vivantio Ticket to the Work Item.
CONFIGURATION IN AZURE DEVOPS
Getting Information Back From Azure DevOps
Configurations can be made in Azure DevOps to automatically send information from DevOps into Vivantio. This is done using the Service Hook that was create in Step 1.
Step 6:
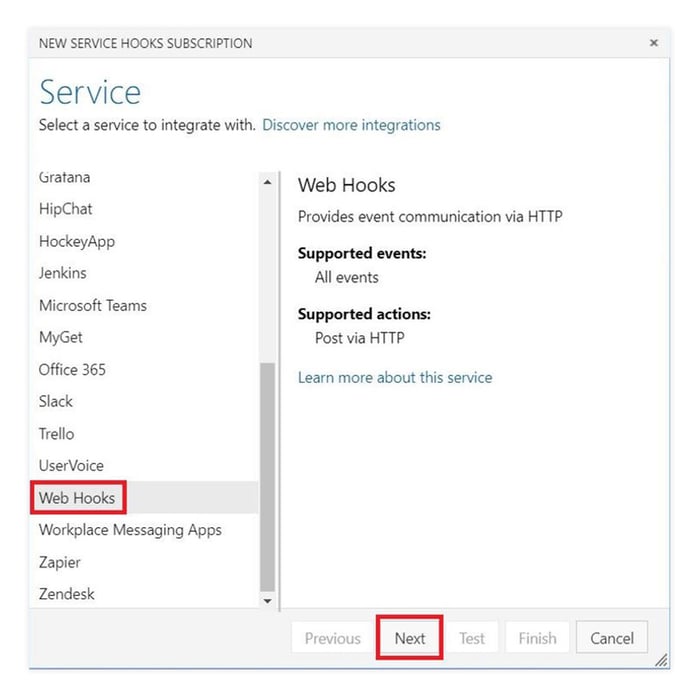
To configure the Service Hook in Azure DevOps, navigate to Service Hooks within Project Settings in Azure DevOps (Microsoft’s documentation on Service Hooks can be found here). On the first page of the Create Service Hook wizard, you’ll choose the Webhooks option and select Next:
On the next page of the wizard, you’ll choose the type of event the Service Hook triggers on. Vivantio currently supports “Work Item Commented On” and “Work Item Updated.” Enter any filters you want for the area or work item type.
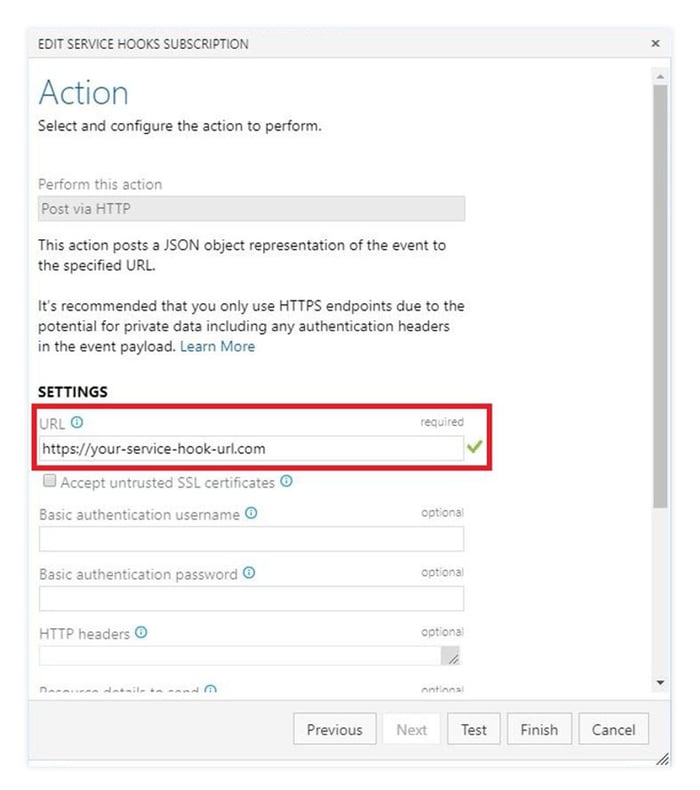
 Select and configure the action to perform with the service hook. Under “URL,” paste your service hook from Step 1. Scroll to the bottom of the page and select “[Latest]” for Resource Version.
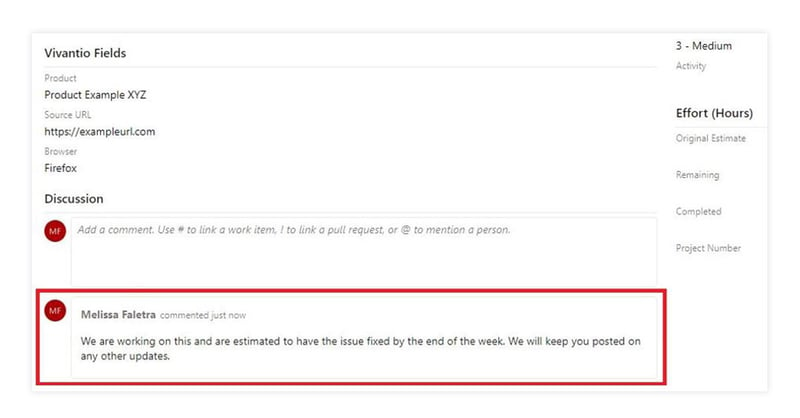
 Now when we comment on Work Items in Azure DevOps...
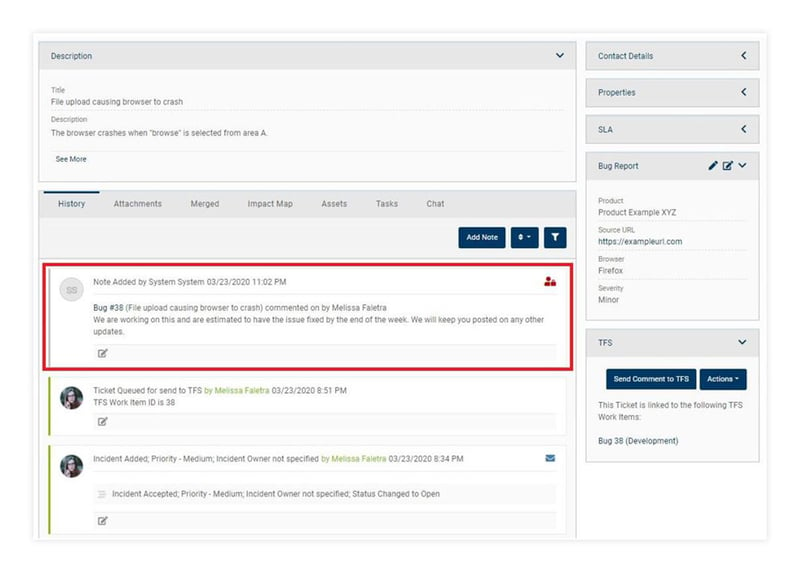
...the comment is automatically added to the linked Ticket’s history in Vivantio:
 Additional configurations can be made in Azure DevOps using Webhooks to automatically update fields in Vivantio based on updates in Azure DevOps.
If you’re using Vivantio and Azure DevOps and you don’t have them integrated yet, give it a try and see how it helps improve communications between your service desk and your development team.